

Table of Contents
- Immediate Steps to Take When You Discover a Leak
- How to Identify the Source of a Water Heater Leak
- Water Heater Pressure Relief Valve Leaking: Causes and Fixes
- Drain Valve, Inlet, and Outlet Connection Issues
- Condensation vs. Tank Failure: What the Moisture Means
- Water Heater Repair vs. Replacement: Making the Call
- How to Drain a Water Heater for Inspection or Repair
- Frequently Asked Questions
Last Updated: September 16, 2026
Immediate Steps to Take When You Discover a Leak
- Shut off the water supply. Turn the cold-water inlet valve on top of the tank clockwise until it stops. If the valve is seized or you can’t find it, close the main shut-off valve to the house.
- Cut the power. For a gas unit, turn the dial to “off.” For electric, flip the breaker. Water and live heating elements don’t mix.
- Contain the water. Towels, buckets, a drip pan, water damage spreads fast.
- Open a hot-water tap. This relieves pressure in the tank and slows the flow.
- Photograph everything. You’ll want images for your plumbing inspection and, if it comes to it, your insurance claim.
Never ignore a leak because it looks minor. A slow drip from a faulty gasket can quietly rot the subfloor for weeks before you notice soft spots. By then, you’re paying for carpentry, not plumbing.
Once the water is contained, start troubleshooting: the leak’s location tells you which cause you’re dealing with.
How to Identify the Source of a Water Heater Leak
Identifying the source starts with tracing where the water actually appears. Water travels along pipes, tank seams, and the floor, so the puddle is often several feet from the failure point. Dry the area, wait, and watch, then use the visual map below.
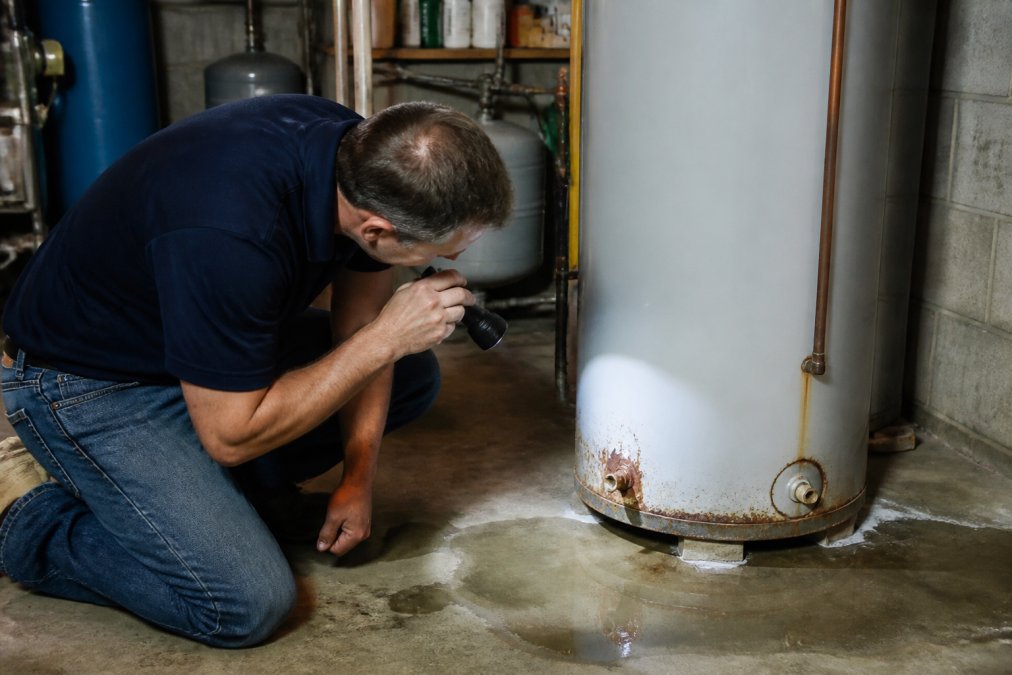
Visual Map: Where the Water Appears vs. What It Means
Think of the tank in three zones. Where moisture shows up tells you more than the puddle’s size.
Zone 1, Top of the tank (above the upper seam).
- Inlet and outlet connections: water at the threaded fittings or pipe above them, usually a loose fitting, worn thread tape, or a cracked dielectric nipple.
- T&P relief valve: water drips from the valve body or discharge pipe, thermal expansion, sediment, or a worn valve.
- Anode rod port: moisture at the hex head on top, a degraded gasket or a rod never re-sealed after inspection.
Zone 2, Middle of the tank (the vertical seam and side fittings).
- Tank weld seam: a rust-colored streak or bead of water down the side, internal corrosion reaching the surface, not a repairable fitting.
- Element gasket (electric units): moisture around the side access panel, usually a hardened gasket or loose element.
- Thermostat access: water inside the panel cavity, not on the floor, often a gasket or a pinhole in the tank behind the panel.
Zone 3, Bottom of the tank (below the lower seam).
- Drain valve: drip at the spout or the valve stem. Sediment jammed in the seal or a cracked plastic/brass body.
- Base of the tank: water pooling directly under the unit, often with rust flakes. Internal tank corrosion or a cracked tank floor, replacement, not repair.
- Drip pan overflow: water in the pan but not obviously from the tank, possibly a slow top leak traveling down the outside.
The Paper-Towel Test
If the source is still ambiguous, dry the tank and wrap a dry paper towel around the base, the T&P discharge pipe, and the inlet and outlet fittings. Check every 30 minutes for two hours, where the towel is wet first is your failure point.
Timing Clues
- Leaks only while the burner or element runs: condensation, a failing T&P valve, or a fitting that expands under heat.
- Leaks constantly, even when idle: tank corrosion, a loose fitting, or a drain valve that never fully seats.
- Leaks only after hot-water use: a failing T&P valve reacting to thermal expansion, or a check valve that’s trapping pressure.
- Leaks after a cold-water refill: condensation on a cold tank in a humid space, especially in summer.
Leaking from the Top vs. Leaking from the Bottom
Leaking from the top is usually better news: a loose inlet or outlet connection, a faulty gasket, or a failing T&P relief valve, all repairable, often the same day.
Water Heater Pressure Relief Valve Leaking: Causes and Fixes
A water heater pressure relief valve leaking is worth taking seriously, because that valve prevents the tank from exploding.
Common causes include:
- Excessive thermal expansion. As water heats, it expands. Without an expansion tank or a working check valve, that pressure has to go somewhere.
- Sediment buildup. Sediment at the bottom of the tank traps heat, causing the water to overheat and the valve to release.
- A failing valve. The valve itself wears out and starts weeping even at normal pressure.
- High incoming water pressure. If your home’s water pressure runs high, the valve becomes the release point.
Before you replace a relief valve, install or check the thermal expansion tank. Replacing the valve without addressing expansion pressure just moves the problem, and the new valve will fail within months.
Drain Valve, Inlet, and Outlet Connection Issues
Drain valve, inlet, and outlet connection problems account for many leaks that look worse than they are, fittings, not tank failures, and most are fixable with basic tools.
| Leak Location | Likely Cause | DIY or Pro |
|---|---|---|
| Top connections | Loose fitting, faulty gasket | Often DIY |
| Relief valve | Thermal expansion, sediment | Pro recommended |
| Drain valve | Sediment, cracked body | Pro recommended |
| Bottom of tank | Tank corrosion | Replacement needed |
Condensation vs. Tank Failure: What the Moisture Means
Condensation is temporary moisture that forms on a cold tank in a humid space, while tank failure produces water that keeps returning after you dry it. That distinction saves you from replacing a good water heater.
Look for these signs of tank failure:
- Rust-colored water from hot taps
- Visible corrosion or rust streaks on the tank
- Water pooling directly under the tank, not on the pipes
- A metallic taste or smell in hot water
Water Heater Repair vs. Replacement: Making the Call
Water heater repair vs replacement comes down to three questions: where is the leak, how old is the tank, and what does the tank look like inside. A tank leaking from the body cannot be repaired; one leaking from a valve or connection usually can.
The Repair-or-Replace Framework
- Under 8 years old, leak at a fitting or valve: repair.
- Over 10 years old, any leak: lean toward replacement, especially if the tank shows corrosion.
- Leaking from the tank body or base: replace, no exceptions.
- Repeated repairs in the last two years: replace.
- Rust-colored hot water or a metallic taste: replace, the tank is already corroding from the inside.
Cost-Benefit: What Each Path Actually Costs
A single repair on a tank-style unit, a new drain valve, T&P valve, tightened fitting, or element gasket, typically runs a few hundred dollars and can buy years of service if the tank is otherwise sound. A full replacement of a standard 40- to 50-gallon tank-style unit typically runs into the low four figures installed, and a tankless conversion runs higher because of venting, gas-line, and electrical work.
A few trade-offs worth naming:
- Repair keeps the same efficiency rating. An older, less efficient model locks in higher energy costs for its remaining years.
- Replacement resets the clock and the warranty. A new unit comes with a fresh manufacturer warranty.
- Emergency replacement costs more than planned replacement. Weekend, holiday, and after-hours calls carry premiums, so planning the swap beats reacting to a flood.
Does Homeowners Insurance Cover a Leaking Water Heater?
The answer depends on cause, not the leak itself.
- Sudden, accidental discharge: Many standard homeowners policies cover the resulting water damage, soaked drywall, ruined flooring, damaged belongings. The water heater itself is usually not covered; the damage it caused often is.
- Gradual leaks and long-term seepage: Policies commonly exclude damage from a leak the homeowner knew about or should have noticed. A slow drip that rotted a subfloor over months is a classic denial.
- Maintenance-related failures: Sediment buildup, skipped flushing, and a corroded tank that was never serviced can be treated as neglect, another common exclusion.
- Age of the unit: Some carriers scrutinize claims on units past their expected service life.
Practical steps that protect a claim: photograph the leak and damage before cleanup, keep receipts for emergency mitigation, save the failed part if a plumber replaces it, and document the date you first noticed the problem. Review your policy or talk to your agent, coverage varies by carrier and state.
DIY vs. Professional
A drain valve swap or a tightened connection is a reasonable weekend job for a confident homeowner. Anything involving the tank body, the T&P valve, gas connections, or electrical elements belongs with a licensed professional. The U.S. Department of Energy’s water heating guidance outlines how efficiency and age factor into the decision.
How to Drain a Water Heater for Inspection or Repair
Draining a water heater is straightforward, but the order of steps matters. Skip one and you’ll scald yourself or flood the floor.
- Turn off the power or gas at the breaker or gas valve.
- Close the cold-water inlet valve on top of the tank.
- Connect a garden hose to the drain valve and run it to a floor drain or outside.
- Open a hot-water tap somewhere in the house to let air in.
- Open the drain valve and let the tank empty. Expect it to take 20-30 minutes.
- Flush the tank with a few gallons of clean water to clear sediment.
- Close the drain valve, remove the hose, and refill before restoring power.
A water heater leaking is a diagnostic puzzle, not a verdict. Trace the water, check the fittings, and confirm whether the tank itself is compromised before you assume the worst.
Frequently Asked Questions
Can I still use my water heater if it’s leaking?
It depends on the leak source. If the leak is from a loose fitting or the T&P valve, you may be able to use it briefly after shutting off the water supply. If water is pooling from the tank itself, stop using it immediately; tank corrosion means the unit could fail completely and cause significant water damage. Turn off the power or gas, close the shut-off valve, and call a licensed plumber to assess the situation before running any hot water.
How long will a hot water tank last once it starts leaking?
A leaking tank rarely lasts more than a few days to a few weeks, and the timeline depends on where the leak originates. A faulty gasket or loose drain valve can be repaired and the tank may last years longer. A leaking tank bottom from corrosion, however, means the steel has failed and replacement is the only safe option. Water heater lifespan averages 8 to 12 years, so if yours is in that range and leaking from the tank, plan for replacement.
Is it dangerous to have a leaking water heater?
Yes, a leaking water heater creates several hazards. Water near electrical connections can cause shocks or short circuits. If the leak is from the T&P valve, it may indicate excess pressure inside the tank, which risks a rupture. Standing water also damages flooring, drywall, and personal belongings. Shut off the water supply and power or gas immediately, then contact a professional plumber to inspect the unit and address any safety concerns.
Does a leaking water heater mean it needs to be replaced?
Not always. Leaks from the T&P valve, drain valve, inlet or outlet connections, or a faulty gasket are often repairable. A leaking tank bottom caused by corrosion or sediment buildup, though, means the tank itself has failed and replacement is necessary. A plumber can perform a plumbing inspection to determine whether the issue is a simple fix or a sign that your unit is nearing the end of its water heater lifespan.